Showing posts with label buying guide. Show all posts

Monday, 19 December 2016

Current Equipment Setup - Helmet

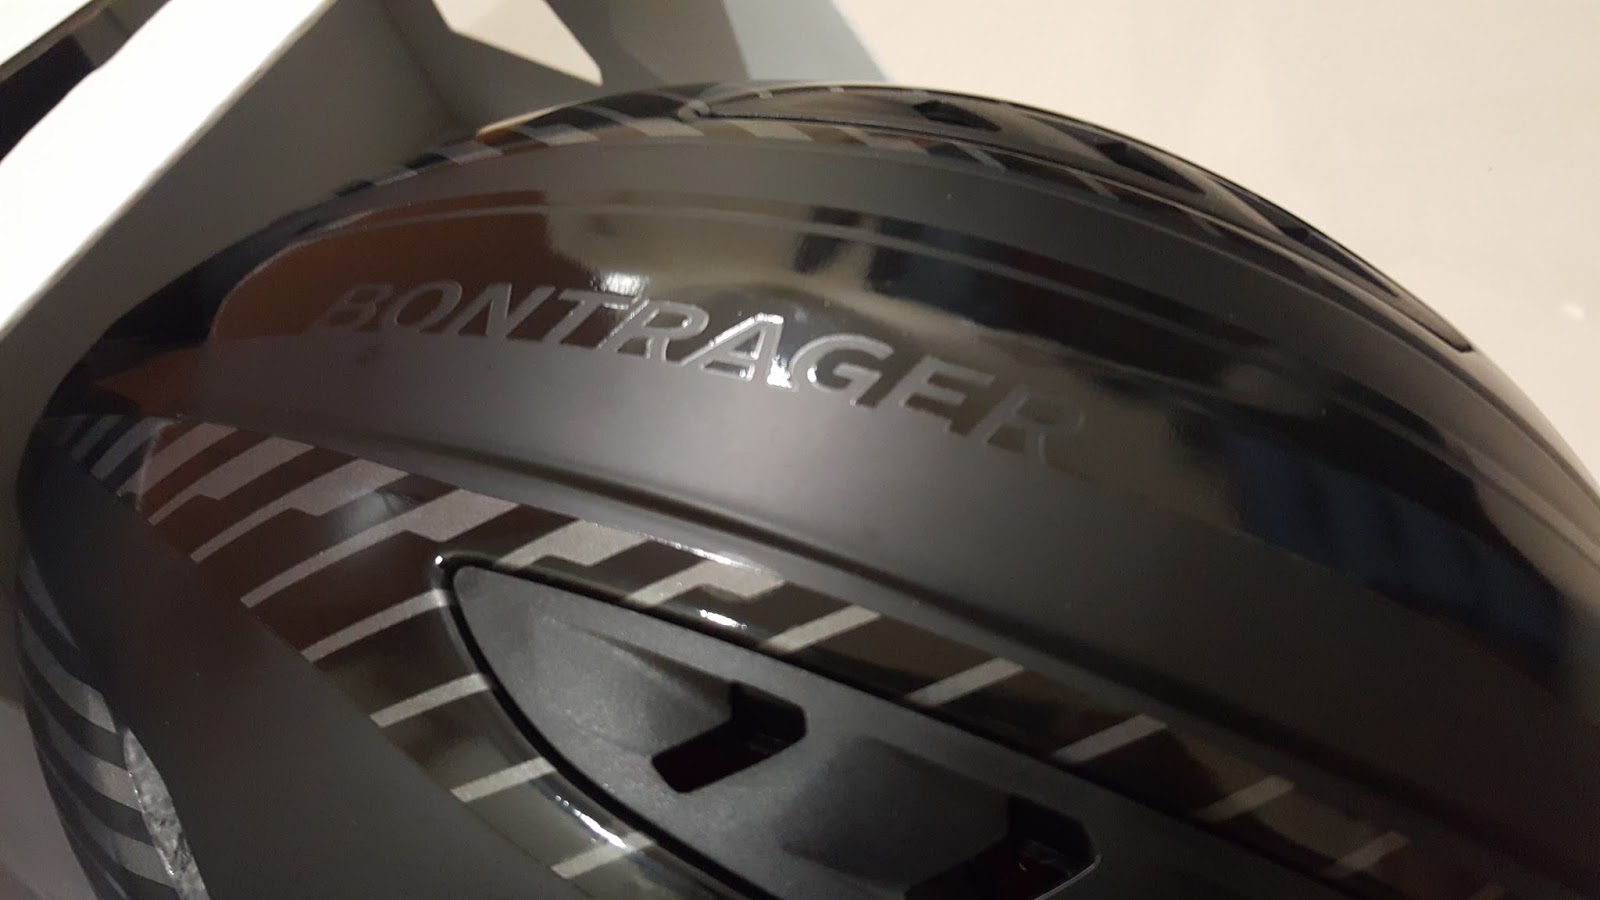
In one of my older posts regarding bicycle helmets and their pricing, I touched briefly on my old cycling helmet, my Bell Ukon II and mentioned that it was well past time that I looked for a new helmet. well, the wait is over, here it is, the Bontrager Ballista aero helmet. 


Right off the bat, let me just say that while I do partake in some cycling events and I do have a competitive side to my character, I put very little weight on the number of seconds I save over X number of kilometers or at X kilometers per hour when I bought this helmet. Despite it being more aero and technically 'faster' than a conventional helmet, I feel that for a general consumer, other factors play more crucial roles in determining a helmet's worth, even if it's an aero helmet. Any number of seconds saved are just added bonuses.

Some quick specs, this helmet weighs 262g, lighter than my 314g Bell and is a size Medium. it came with a beautiful matte black finish with some gloss accents at the sides. 


It uses Bontrager's 'Headmaster 2' system which allows for circumferential adjustments via a quick-wheel at the rear as well as a small amount of height adjustment for the rear adjuster portion of the helmet, similar to but not as adjustable as certain Kask helmets.


Adjusted UP

Adjusted DOWN

Along with the removable inner padding, all these factors put together make it a tad bit more comfortable than my older helmet.


This helmet was originally priced at RM679 which is a competitive price for an aero helmet once you take into account the more well known ones like the Giro Synthe, Kask Protone or the Specialized Evade, but with the end of a year comes clearance sales. As a result, I was fortunate enough to pick this up for 30% off at RM472 from Treknology 3 in Kota Damansara during their clearance sale, which is fantastic value for money for most helmets in general. 


The helmet comes in the white box shown below as well as a draw string helmet bag in which to keep your expensive helmet so it doesn't get all scratched up and an extra set of foam padding which I'll get to in a bit.


Ideally, I would've gone with a more eye catching colour like white so as to be more visible on the road, but the only 2 colours left were this and a fluoro green model that was just a little too extreme for me. So I opted for the more subtle black instead, matches my bike's paint scheme a little better too.


Aesthetically speaking, it's an aggressive looking helmet without being gimmicky. Say what you want about looks, but I'm willing to bet most of us, either consciously or subconsciously place a larger emphasis on the looks of our gear than we'd like to admit, which is why I have to address the appearance of the helmet. It balances itself well between conventional-looks and aerodynamic-aggression. The 3 large front vents add a practical appeal to the helmet while the clean sides remind you that it's meant to go fast. Add the matter black paint scheme and you've got yourself a helmet Batman would use.


Other than that, what made this helmet very appealing to me were the tons of glowing reviews online regarding this helmet. So far, they've definitely proven right. The 3 vents at the front are more than sufficient at keeping my head cool as ventilation is definitely on par with my older, more ventilated helmet. 

On the inside, these 3 front vents channel air through internal grooves in the helmet and out the back. Whether or not this was how the helmet was designed to work or if it's purely aesthetics, it certainly does the job at keeping your head cool. One gripe I have about ventilation is that when the front vents aren't directed forwards, such as when you flex your neck to look down or side to side, the ventilation or air flow is noticeably decreased. This isn't a deal breaker for me but for someone who wants a middle ground between aero and ventilation or thinks that the vents on this helmet facilitate air flow as well as a more ventilated helmet, he or she would be better off looking for something else.


The straps on the helmet are thin and relatively light, making them quite comfortable but I don't know of too many helmets with heavy straps. A gripe I have with them, despite countless attempts at adjusting the helmet, is there not being enough room between the straps and my ears. Now, they aren't uncomfortable or over lie my ears, it's just that I've gotten so used to the amount of clearance between the straps on my old helmet and my ears that I would prefer to have the same sensation of comfort with this new helmet, especially considering the fact it's almost 3 times the price. Although, to be fair, my ears are a little more everted than that of a normal human being, so this isn't so much an issue as it is a nit pick. 


In short, there's very little not to like about this helmet. It looks cool, it's well ventilated, comfortable, light weight and for the price I paid, has terrific value for money. I'd definitely recommend this helmet to anyone looking at picking up a new helmet or want a more aero lid over their heads. The latest Ballista with the new MIPS system hasn't reached our shores just yet and I'm not too sure how much it'll be going for here seeing as how our poor Ringgit isn't doing so well and with the possibility of newer aero helmets coming out next, I can't confidently tell you to wait for that model, but if it's anything similar to it's predecessor in terms of price and performance, you probably won't go too wrong with your purchase.

Wednesday, 14 December 2016

Current Equipment Setup - Sunglasses

As time goes by, any cyclist who trains consistently a decent amount will find that they become more comfortable on the bike and are able to ride longer distances with out fatigue setting in so soon. Such is the natural progression of a cyclist. However, if you are to stay on the roads for progressively longer periods of time, it would be wise to invest in a pair of sunglasses.


Genuine lenses offer protection against harmful ultraviolet (UV) rays that can result in pre-mature cataracts or pinguecula within the eyes. Apart from that, they reduce the glare that we experience from sun light bouncing off shiny surfaces that might distract us during our rides. It also acts as a physical barrier against bits of debris on the road that may be kicked up by car tyres or sand falling off over-filled lorries (personal experience). So, in the event your budget allows it, invest in a decent pair of sunglasses.

My first and current pair are the Rudy Project Noyz. They're a relatively conventional looking pair of cycling sunnies, nothing over the top or too gimmicky. I bought them around the middle of 2015 and have used them for both mountain biking and road cycling, as well as the occasional run and when I'm driving, but more on that later.


The pair you see here has a matte black frame along with what they call 'Smoke Black' lenses that are photochromic and polarised on top of having the conventional UV-protective properties. They cost me about RM1100 ($275 according to current exchange rates) which is a ridiculous amount of money to pay for a pair of sunglasses but I'll try my best to explain why I made the purchase and how I fell about it one year on.


First off, I wear prescription spectacles because of my myopia (short-sightedness) and slight degrees of astigmatism. Contact lenses just never appealed to me as they're relatively high maintenance and require a degree of patience and care with them that I just could not be bothered with. So, when I was on the look out for a pair of sunglasses, I had to take into account prescription lenses. After a decent few months of research online and going to a couple of stores, I learned of another issue, curvature.

If you've ever wondered why most spectacle lenses are relatively flat even with their convexities or concavities, it's because it helps in optimizing light refraction. Most cycling-specific sunglasses that don't have prescription lenses and, instead, have extremely curved lenses when compared to a pair of spectacles. This is probably for aesthetic reasons, better aerodynamics as well as greater peripheral coverage. This was also a problem as in order to have proper vision with a pair of sunglasses, special lenses had to be crafted in order to compensate for the excessive curvature of the frame. After digging around with major sunglasses brands like Oakley, I learnt that such special lenses had to be made overseas and then imported in to Malaysia, which of course adds to the cost. A pair of Oakley M2s would cost approximately RM1400 once the imported lenses were installed, a hike of almost RM900 from the normal RM500 plus price, which I thought was a ridiculous amount of money to spend on any one thing, let alone a piece of plastic that sits on your face (you can thank those Luxotica bastards for that).

My pair of Noyz actually cost around the realm of RM800. However, what made this particular model appealing, or rather the Rudy Project brand in general, was that they had clip-ons that mounted conventional prescription lenses onto the nose piece of most of their sports sunglasses. So theoretically, you'd be able to experience optimum vision whilst still wearing curved cycling sunglasses. Boy was I wrong.


Within moments of putting them on, I realised what a big fat mistake I had just made. The curvature of the frame was still too extreme, so much so that the prescription lenses on the clip-ons were not only touching the sunglass lenses at the edges, but we're being forced or flexed into the same curvature as the frame. After a couple of minutes on, my vision adjusted but there was this strain in my eyes that would never go away. It's gotten better now and my eyes are almost instantly able to adjust when i swap my spectacles for sunglasses but the strain is still noticeable. Everytime I finish a ride and swap over to my regular spectacles, I can't help but feel slightly relieved and annoyed at the same time.


Remember when I said the prescription lenses were coming into contact with the sunglass lenses? Well after a year of usage, this small amount of contact has resulted in a decent amount of the lens tinting being scraped off. Yup, Rm800 worth of lenses just fucked (excuse my German) because of a shitty design. 


Apart from that, they're a hassle to clean after a ride. You've gotta remove the sunglass lenses and then the prescription clip-ons, clean them both, them assemble them back together. All the while scraping off more of the lens tinting with each clean. And because there are 2 lenses at work on each side, when ever sweat gets in between the sunglass and prescription lenses, it's just a plain pain in the ass as you can't just take em off, wipe the lense with your shirt and keep on going as you would do for a pair of regular sunglasses or Spectacles. You've either got to bare with your already shitty vision being obstructed by sweat or stop by the road side, remove the sunglass lens, clean, reattach then go.

Next is fogging, it happens so fucking often, especially on those blistering hot afternoon rides, like the cherry on top of a cake for possibly the shitiest pair of sunglasses out there. 

As for the photochromic properties of the ridiculously expensive but now scratched to shit lenses, it's virtually nonexistent anymore. Take a bright white torch light and shine at a spot for a couple of minutes, nothing. It still retains its polarising properties, both the lens and how they make me feel. 
Also, i don't quite know why and I can't quite remember when it started, but lately I've noticed that bring objects such as the white lines at the sides of roads appear blurry, almost like a double-vision sort of experience. The only other time I've experienced this is with badly scratched spectacles. I've always cleaned the sunglasses and prescription lenses with the supplied microfiber bag cloth but it appears this pair of sunglasses really wants to be a champion at being the most fucked up (forgive my Russian) pair of sunnies out there.


Long story short, stay away from this route if you're in need of prescription sunglasses. get a pair of conventional sunglasses with relatively wide lenses and make a tinted pair or prescription lenses with UV-PROTECTIVE properties and save yourself the trouble, time, inconvenience and money wasted. If you're willing to splurge a little, go with the imported lenses option.


Writing this post has got my blood boiling just thinking about the piece of shit (pardon my French) I wasted so much money on. I hope a decent number of people can take something home from my misfortune and make wiser decisions when picking up a pair of sunnies. Don't make the penny wise, pound foolish mistake I made.

Sunday, 4 December 2016

Top 10 tools a cyclist should own

Cycling is a multi-faceted sport and in order to be a well-rounded cyclist, not only do we have to sharpen our skills on the bike, but a decent amount of emphasis also has to be placed on our technical know-how when it comes to working on our bikes. Indexing gears, trouble-shooting a pesky squeak, replacing an old worn out chain with a new one, replacing a punctured inner tube with a new one and so on.

However, all of that knowledge and insight won't get you far if you don't have the tools to execute them. And with the ever rising cost of living and the less than decent performance of our Ringgit over the past few years, investing in a good set of tools will help you save some cash in the long run as you'll be able to handle your mechanical problems in-house rather than get a bike mechanic to do it which is going to cost you cash. So, here are my top 10 tools every self-sustaining cyclist should have in order of increasing importance.

Spoke wrench/key
Kicking off this list at number 1 is a spoke key. After a couple of thousand kilometers or so, the spokes on our rims will twist and turn unevenly from one another due to the various impacts our tyres make with the road and all it's bumps and surprises, This, after awhile, will cause the rim to go out of true. This may not seem like an issue at first, but if not treated soon, it can cause the drive-train or groupset to wear-out prematurely, especially the chain and rear cassette. After awhile, the rim may start to rub against your brake pads or worse, the chain stays. Eventually, the structural deformity may become permanent, costing you a bomb as you'll need a new rim. A spoke key is needed to adjust the spokes of your rim in order to bring it back into true again.

The main reason why a spoke key is at the bottom of my list so to speak is because it's not an emergency tool and you're probably only going to be using it once every one to two years at most. Apart form that, in the event you don't want to buy one, most bike stores offer wheel truing services as part of their basic tune-ups which will cost you some where around RM45 to RM60. So not too much of a big deal.

Torque wrench
At number 2 is a torque wrench, a highly recommended tool in the event you own a carbon bike. According to senior bike mechanics, the number one cause of damage to a carbon frame or carbon components is not crashes, but over-tightening. This is where a torque wrench comes in. It is essentially a wrench or spanar that will ensure you tighten the screw on your carbon frame and components to their recommended settings and not go beyond. You've already spent so much on your prestine carbon bike, invest a little more so it stays prestine.

A torque wrench will be significantly more useful to you than a spoke key, as you'll service your headset, groupset, seatpost and what not much more frequently than truing your wheels. Plus, in the event you have a bike bag and travel frequently with it to races, you're going to have to disassemble certain parts of your bike before storing it into the bag, that'll require a torque wrench so as to ensure everything is set appropriately.

Chain-cleaner
Next up is a chain cleaner. This takes the lead over the torque wrench as any self-respecting cyclist would clean his or her bike at fairly regular intervals or at least an appropriate amount depending on how much he or she rides. It prolongs the life of your groupset, improves your bike's performance, adds moral to your rides and it's certainly going to be done more often that disassembling parts of your bike and reassembling them with a torque wrench.

Anyone who's ever tried to get their bike's drive train absolutely spotless will know it's virtually impossible to achieve regardless of how much degreaser and detergent you throw at it. And before you say anything, I will have to admit that I was skeptical at first, but once I saw how effective and EASY it was to use a chain-cleaner, all doubts just faded away. If you're serious about how clean you want your bike to be, a chain-cleaner is going to get you a long way.

Chain tool
Perhaps the second commonest mechanical issue you'll face when out on a ride after a punctured tyre is a snapped chain. In the event you don't keep track of how worn out your chain is, it may just snap on you one fine day when you're hustling up that climb and putting all you've got into your cranks. Cleaning your bike and drive train regularly will prevent all that grime and dirt from building up but all the cleaning is the world isn't going to prevent the inevitable. Everything ages with time and so does your chain.  

'Chain stretch' comes from the bushings wearing with the chain pins. Overtime, the inner diameter of these bushings increase and the pins groove out. Not only does this result in sloppy shifts, but it increases the risk of your chain snapping.

Regardless if you're out on the road and need to temporarily mend a snapped chain with a quick link or at home and are planning on replacing a worn-out chain with a new one, you're going to require a chain tool to break the links in the new chain prior to installation or in the old prior to installing the quick links.

From this point onwards, you'll find the tools I've actually spent money on to purchase as I feel they're worth the investment in the long run and have allowed me to maintain my bike without the need to depend on a bike shop mechanic. 


Allen keys
They might not be the most useful tools in an emergency, but chances are, you'll probably be using a set of Allen keys more often to make fine adjustments when you're servicing your bike than a chain tool to replace a snapped chain by the side on the road. In fact, they're probably the only tools on this list that can be used outside of cycling. From putting together furniture to tightening a loose screw, you'll be a regular handyman with just a set of Allen keys.

However, in the event you're interested in saving some cash instead of splurging on a full drawer's worth of Allen keys, just pick up sizes 4, 5 and 6 as these are the most commonly used keys as far as bicycles are concerned. Of course, a torque wrench would be preferable over regular Allen keys especially if you own a carbon bike, but taking into account cost and overall practicality, Allen keys are far cheaper, easier to obtain, require no calibration and can be used for far more things than just bikes


Saddle bag
Probably one of the earliest upgrades to a bike a cyclist can make long before aero rims or top of the line group sets is a saddle bag. Now, granted, you're bike doesn't need a saddle bag to function, nor will having one make you go faster. If anything, it does add some amount of weight to the bike. But take a look around the next time you're on a group ride an chances are a good majority of the bikes you see, no matter how high-end they are, will have a saddle bag on them. It just makes it more convenient to carry your essential tools with you when out on a ride. Plus, they're relatively inexpensive with a decent one costing you below RM150, sub-RM100 if it's on sale. 

No more needing to constantly stuff inner tubes, a mini pump, a multi tool, patches, etc into your back pockets every time you want to go out for a ride. Keep it all in a saddle bag so you'll never have to worry about such things ever again. 


My trusty 12 year old saddle bag, still going strong


Tyre levers
A puncture is an eventuality every cyclist will have to face one day. Even if it occurs not too far from home and we're able to pedal back at a snail's pace, the inner tube will still need replacing nonetheless. Plus, the ability to replace a punctured inner tube is considered by many to be a must-have skill for any cyclist, regardless of skill level.

Even though you can, with some degree of difficulty, replace a punctured tube with a new one without the aid of tyre levers, a pair of plastic tyre levers will cost you less than RM10, are small and weigh next to nothing, making them ideal tools to carry with you on any ride so as to be prepared for a pesky puncture. Most bike shops tend to sell 'puncture kits' that include a couple of tyre levers with one or two spare inner tubes and some tyre patches too.


Some tyre levers and spare inner tubes


Mini-pump
While we're still on the subject of punctures, a pair of tyre levers will only get you half way. In the event of a road side puncture and your hours away from home, you're going to need a pump to inflate the newly installed inner tube. As conveniently quick it is to use a track pump when inflating a tyre, they're far to big and cumbersome to be carried on a long distance ride, even if your bike has panniers and a pannier rack. Here is where a mini-pump comes in.

They may take a little while longer in comparison to a track pump, but they're far more portable and light, making them ideal pocket tools on long distance rides. The mini-pump I bring along on long rides is attached to a holster of sorts which integrates well with the bottle cage mounting holes on the seat tube. However, in the event you choose to get one that has to be carried in your back pocket, then I'd recommend prioritising portability over inflation speed. The way I see it, I'd rather have something that I'm going to have to carry all the time be portable rather than save an extra minute or two on that rare occasion when I have to do a road-side fix.


Multi tool
In the event you want to be well-equiped but don't want to have too many tools cluttering your house, then perhaps you could invest in a multi tool containing most of the aforementioned tools. A decent RM100 - RM200 tool usually comes equipped with 50% of the tools on this list. The one I'm using is the Crank Brother M17 which has Allen keys sizes 2mm, 2.5mm, 3mm, 4mm, 5mm, 6mm and 8mm, a chain tool that's 8, 9 and 10 speed compatible, a spoke wrench/key, a flat head and Phillips screwdrivers, a T-25 torx wrench for disc brake rotors and 8mm and 10mm open wrenches. If you do enough digging, you can probably find one for under RM130. The one I have is from USJ Cycles.

Ever since getting it, I've not had the need to reach for other individual tools, even when I'm sat at home and need to make adjustments to my bike. It's extremely portable and fits nicely in my saddle bag along with 2 spare tubes and 2 tyre levers. It weights just 168g and while it's probably not the lightest multi tool out there, what's a couple of extra grams for something that delivers exceptional value for money. 


Track pump
And finally, the most important tool, in my opinion, that every cyclist needs to have is a trawck pump. Even though you may have a mini-pump, there's no way it can beat out a track pump when it comes to practicality. It almost goes without saying that if you own a bicycle, you have to own a track pump. Even if you didn't have all the other tools on this list, if your tyres are underinflated or plain flat, there's no way you're going to be able to ride your bike without potentially damaging your tyres or rims or worse. It's like a owning a pair of running shoes without laces or a badminton racquet without it's string. Do I even need to get into this?


A pressure gauge like the one you see here would be preferable

And that's about it. This list wasn't put together with tons of scientific data to back it up. Instead, it's a very subjective one that takes into account my own personal experience with cycling tools as well as my opinions on how useful they are to the average cyclist, especially one who's on a budget. That's it for now. As always, feel free to leave any and all comments or questions in the comment section down below and I'll try my best to answer. Thank you for reading!

Saturday, 19 November 2016

Things no one tells you before you start cycling

Congratulations! You've finally got yourself a bike along with some decent kit. That's probably the biggest hurdle you'll encounter when becoming a cyclists right? Getting the bike? Well, this article might, unfortunately, crush any dreams you may have of riding down the Champs Ellise in that yellow jersey one day. Here is my list of top 5 things people don't tell you before you start cycling.


It's hard
In most sports, professionals always make everything seem way easier than they actually are. Cycling is, unfotunately, no exception. From climbing a mountain to going on the attack, 100+ kilometer Tour de France stages to the cobbles of Paris-Roubaix, it always seems so effortless on the TV. That is, until you actually try it out for yourself. Chances are, if you're getting into cycling without a decent background in some other physical sport, you're thighs and back will be killing you within 5km from home. Plus, if you've never ridden a bike before, you'll most probably be unfamiliar with bicycle gears or how to use them, causing you to be shifting late and stalling up a long climb.

Not only that, once you've built up a little more stamina, figured out how your gears work and generally feel a little better about yourself, enter group rides. The challenge of balancing your composure so as to ride predictably in the group while still pedaling your heart out and cursing under your breath to keep up with the wheel in front of you is perhaps a quirk exclusively found in cycling. And depsite all that effort and suffering, it'll be all the more disheartening when you get dropped, a.k.a the group is just too fast for you and you get left behind.


It's pricey
I've met my fair share of riders who've forked out bigs sums of cash or have taken out loans to pay for their high-end road stallions so as to own the latest and greatest the bicycle market has to offer. Unfortunately, in all that haste, they didn't stop to consider the long-term financial commitments that come with cycling. Owning a bike is, in many ways, similar to owning a car; you can suffer from punctures, it gets damaged in crashes, it requires regular sevicing, wear-and-tear affects the drive-train (gears and chain) and it can get stolen. And of course, as with a car, the pricier your bike is, the higher the cost to maintain it.

In my post on how to buy your first bike, I touched briefly on the different kinds of bicycle frames and groupsets out there. A groupset consists of the parts on your bike other than the frame, wheels, seat and seat post, handle bar and the handle bar stem. In other words, the gears, shifters, brakes, deraileurs and cranks. And as with a high-performance car engine, the higher end your groupset is, the more it's going to cost you to replace those parts once they've worn out. Not only that, most pro-team mechanics recommend changing your chain more frequently if you run a higher end groupset as it's far cheaper to change a chain than it is to change sprockets or the entire cassette once it's worn out. More frequent chain changes will allow your cassette to last longer, sometimes up through 5 chains. The frequency by which you should replace your chain with a new one has been widely debated by many in the cycling community. A consensus that comes up frequently on the internet is after 2000 miles (3200 kilometers) or so, even sooner if you're a little on the heavy side or if you do a lot of climbs. 

Apart from that, those who choose to go down the carbon route had best try to avoid crashes as best as they can. I mean sure, it goes without saying that no one wants to crash. But in the event lady luck took the day off and you do end up eating asphault, chances are you'll probably fare far better than your carbon companion. Carbon bikes are infamously known for their low levels of durability in the event of a major crash. Even if your frame doesn't snap in half, any cracks that form may result in your bike being too dangerous to ride. So, assuming all your groupset components are fine (less than likely), you'll have to get a completely new frame.


There's a lot to learn
Up until this point in the article, if you're even a little bit overwhelmed by the all information, don't worry, most beginners usually are. Wait until you realise what else you don't yet know. 

As with the components that make up a bicycle, from the ball bearings in your head tube down to the rubber that grips the road, there are so many things to learn about cycling. Regardless of how deep your pockets are, not all the problems you encounter can be solved by dropping by your local bike store and handing your bike over to the mechanic who'll be all too happy to see you. A road side mechanical will creep up on you and pounce one day, maybe not today, probably not tomorrow, but one day. And when that day comes, you had best hope you how how to solve your little conundrum, especially if you forgot to bring a phone and are miles away from home. (FYI, here's a list of things I recommend every cyclist carry with him/her when on a long ride). Being able to remedy a flat tyre and fix a broken chain are 2 skills every cyclist should have in his or her repertoir. 

Apart from emergencies, knowing how to perform a basic bike service ( ie replacing a worn out chain, regreasing your head tube and bottom bracket, degreasing and relubing your chain, indexing your gears, etc) will greatly help your wallet out in the long run and is a mark of a seasoned cyclist.


It's not going to get you a 'superhero' body
Unlike most other sports, professional cyclists aren't too well known for having Henry Cavill's Superman-esque body. Instead, our bodies are more akin to that of a T-Rex, big girthy thighs with toned calves while having little going on in the upper limbs. And trust me when I say, after awhile, you'll start to find your favourite pair of jeans or shorts just not fitting you right.

There are of course, exceptions to this law of cycling nature. Track cyclists like 6 time Olympic gold medalist Sir Chris Hoy and our very own Bronze medalist Azizul Awang for instance, both have quite muscular builds, full of the fast white-twitch muscle fibers needed to put out all those watts. But such bodies weren't built on bikes alone, track cyclist spend almost as many hours in the gym as they do out on the track. And before you ask, yes, professional road cyclists do spend some time in the gym as well, but the exercises they do aren't so much to turn them into sprinters but to complement the levels of fitness they achieve on their bikes. In fact, most amateur level riders are capable of putting out the same amount of maximum power of that of a professional. What sets the pros apart is their ability to sustain a higher than normal average power for a longer than normal period of time. So, in the event you think cycling's going to get you a spot in the next Avengers movie, it'd be best to consider a different sport altogether. Plus, our tan lines aren't exactly swimsuit magazine cover material.


It's rewarding
Despite all the obstacles and challenges you'll face as a cyclist, both on and off the road, there's no denying the high that it rewards us with as well as the addiction we so lovingly suffer from. Riding an hour continuously for the first time, finishing that first century ride, conquering that once unconquerable hill, your first race, your first duathlon or triathlon even, a ride across the country or even the world! Some of the many milestones a cyclist goes through, each worthy of celebration in our own small ways as well as acting as a marker for what we've already achieved and a reminder of everything else that we've yet to do.

And then theres its effect on our bodies. Health is not something that can be stolen, created or bought, it has to be earned. Being able to shred up the side of a mountain without slowing down but instead going "I've got this, gimme another gear" or hold the line at the front of a peloton while your mates rest their worn out asses behind you. Being less than 10% body fat or having a resting heartrate under 60 beats per minute, are goals that money can't buy and are in fact status symbols that we as cyclists strive for.

Our tan lines are our badges of honor, signs that we are warriors of the road who have suffered and fought through poor road conditions, ass-hat drivers and the unforgiving heat and should not be hidden but instead displayed proudly, within the confines of our homes.

In short/TL;DR : It's harder than it looks, it's expensive, there's a lot you don't yet know, you're not gonna get buff through cycling and it'll all be worth it at the end.


Annnnnddddd that's about it for this post. Do you agree with all my points? Were there things I missed out? Please do let me know in the comment section down below and tell me what you think. As always, I appreciate any and all feedback, comments and questions and will try my best to get back to you. Until next time, thanks for reading!